It’s easier than you think. It’s also stuff you should know when you drive an old Toyota truck
I get dozens of calls every day with people trying to diagnose various issues with their 22R / 22RE / 22RTE engines. Everything from hard start issues, rough idle, mis-fire, lack of power….blah, blah, blah. Since there are a few hundred things it CAN be, I recommend starting with the basic stuff first. Most of the time these diagnostics will get you 98% of the way to figuring out what is.
This is to be used as a basic guideline to start with diagnostics, there is no substitute for a FACTORY SERVICE MANUAL. That has the most detailed and correct info for your year of 22R/22RE/22RTE. Aftermarket manuals can sometimes lead you down the wrong path since they are written for a year range of 10+ years or more. They can only give you simple info (and sometimes, the wrong info).
These are also the first questions I am going to ask you about when you call and ask for diagnostic help. So it’d be groovy if you have checked out these items BEFORE you call.
Read to get it figured out? Let’s go……..
CHECK THE EASY BITS FIRST…
Those janky aftermarket plug wires? Make sure the ends are fitting all the way into the distributor cap and are snug on the spark plug side. Any cuts or abrasions ANYWHERE on the wires is a potential place for failure.
Pull the spark plugs and check the gap, check for wear.... and make sure they are Denso or NGK. None of those German platinum or "650 billion VOLT, multi-electrode X-TRA spark" shenanigans you ordered off the internet after seeing them on some hillbilly car show you saw on a Sunday morning.
Check the valve adjustment and keep an eye out for any that are too tight. We recommend checking valve adjustment every 7.5k to 10k miles. I know the manual says to adjust them with the engine “hot”, but we’ve found the adjustment procedure to give more consistent results and turn out more accurate when done COLD. Cold means that you can’t feel any heat when you lay your hand on the engine. We also recommend going a hair tighter than the factory says too. .007” on the intake and .011” on the exhaust side. If it’s your first time adjusting valves, TAKE YOUR TIME AND TRIPLE CHECK YOUR WORK. It’s not rocket surgery, but if it’s not done correctly, things can get ugly quick.
MISFIRE….. maybe
Rough idle? Engine shakes at idle? Low idle? Check for a misfire. Since you’ve already adjusted the valves, we know there isn’t a valve hanging open, let’s check for spark. Grab some INSULATED plug wire pliers (the kind with rubber on the handles and on the side that will contact the plug wires too). Be smart and make sure to use the INSULATED pliers, if not YOU WILL GET SHOCKED. I will them point and laugh at you. I know you were probably taught to pull the wires off the spark plug side for this test, here is an easier way… With the engine running pull a plug wire off at the DISTRIBUTOR CAP side one at a time. Start with the #1 plug wire and go around the cap clock wise to keep track. If the idle changes (drops) when you pull a plug wire, you can pretty much say that cylinder is firing. If the idle stays the same when you pull the plug wire at that cylinder, then you know there is an issue with that one. You can concentrate on that cylinder (check the plug wire, spark plug, valve adjust, injector etc…..).
INTERMITTENT “MISS” WHEN HOLDING THE ENGINE AT 1,500 TO 2,000 RPM
I get this one A LOT! It can be a number of different things. Once you’ve checked all of the items shown on this FAQ page, if all checks ok, maybe try this out:
There was an internal bulletin for Toyota factory technicians back in the mid 80’s about a similar issue with 22RE engines. The issue was an internal programming problem with the ECU. Since the ECU advances the timing according to engine RPM, throttle position etc., sometimes it would freak out and give it too much TOTAL advance on accel and partial throttle. It would give it 40+ degrees total advance instead of the 28 degrees (those are random numbers I pulled out of the air, not the ACTUAL numbers, just using them as an example). For a while during the time when owners of these trucks actually brought them to a dealer, one of their fixes was to install a reman ECU (that’s why you see some of the ECU’s in the 85-87 model years have a “-84” after the part number on the sticker, it means remanufactured). It didn’t always help.
One fix that was recommended in another, later year, bulletin was to set the base timing at 3 degrees instead of 5 (which would translate to 10 degrees without the ECU jumped). If that didn’t help? They recommended 2 degrees base timing. I know it sounds counter-intuitive to retard timing to improve performance, but about 50% of the time, it would solve the problem.
Even though I’m using the 85-87 model years as an example, I’ve used this method to fix the problem on trucks all the way up to 1994.
THROTTLE POSITION SENSOR
It’s a big deal. I would actually say…..the biggest deal. You can’t just wing the adjustment, or just assume that it’s good. It’s one of the most important inputs to your ECU. It has to be functioning properly both mechanically and electronically. If this isn’t set properly, you will never get the correct timing either.
Follow this link to see if it checks out mechanically: TPS RETURN SPRING CHECK
Follow this link for step by step instructions on setting it correctly: TPS TESTING AND ADJUSTMENT
Everything checked OK? Move along to the next thing.
IGNITION TIMING
Since you are a responsible 22R/E owner, I know you have this right. But, let’s bring it up just to make sure we are all on the same page.
*ALL OF THESE RECOMMENDED TIMING CHECKS / SETTINGS ARE VALID AS LONG AS YOU KNOW YOUR TPS IS FUNCTIONING PROPERLY. YOU DIDN’T SKIP THAT SECTION, DID YOU?*
Setting timing on your engine properly is one of the most critical parts to make it run right and perform to its potential. This is not a 350 engine you worked on as a kid. This is not an air cooled VW bug engine that you can tune “by ear” and set the points with a matchbook cover. Not setting your 22R/22RE timing properly can lead to very poor performance, bad gas mileage and SEVERE engine damage. Don’t mess around.
Once It’s up to normal operating temp, you can now set the timing with a timing light. Grab a paper clip and straighten it out and then bend it to a “U” shape. Inside of the small plastic box that is next to the underhood fuse box, you’ll find a diagram. Insert the paper clip into the terminals marked “E1” and “Te1” as shown below:
1985-1986 (and some 1987‘s) EFI trucks do not have this box, you’ll find the spot to jump it at the DRIVERS side fenderwell. It is the connector that has 2 wires (not 1, not 3 or 4, just 2). It looks like a wiring harness connector and should be “plugged” into a rubber grommet mounted on the inner fenderwell. It's the same connector you've used to count the codes when your "check engine" light is on. Shown below.


Base timing should be at 5 degrees with the ECU “jumped” and 12 degrees without (of course after the engine is at normal operating temp). If you set it at the 5 degree mark and remove the jumper and it doesn’t advance itself to the 12 degree mark, your TPS is out of adjustment or bad. See the TPS section above.
FOR CARBURETED TRUCKS:
Your truck does not have computer controlled timing, so it’s a little different. To set the initial base timing, remove the inner vacuum line at the vacuum advance on your distributor and cap the vacuum line off (golf tees work perfect). With the timing light (and inner vacuum line off and capped) pointed at the lower pulley, turn your distributor until the pointer is at the 0 degree mark. While it’s still running, re-connect the inner vacuum advance line, it should jump to about 12 degrees at the timing marks. Connect the second vacuum line next. There shouldn’t be any change (you shouldn’t have vacuum at that line at idle). If you don’t have any change in timing when you connect the “inner” vacuum line (and there is vacuum at the hose when running) you may have a bad vacuum advance unit. Get a hand held vacuum pump and test both diaphragms. Both should hold vacuum and not bleed down. If not, replace the vacuum advance unit and perform the steps listed above.
EGR VALVE
Ok, here we go.
The quickest way to eliminate a potential problem with your EGR valve is to take it out of the mix completely without having to remove it from the engine. Here is how by-pass it for diagnostic purposes.

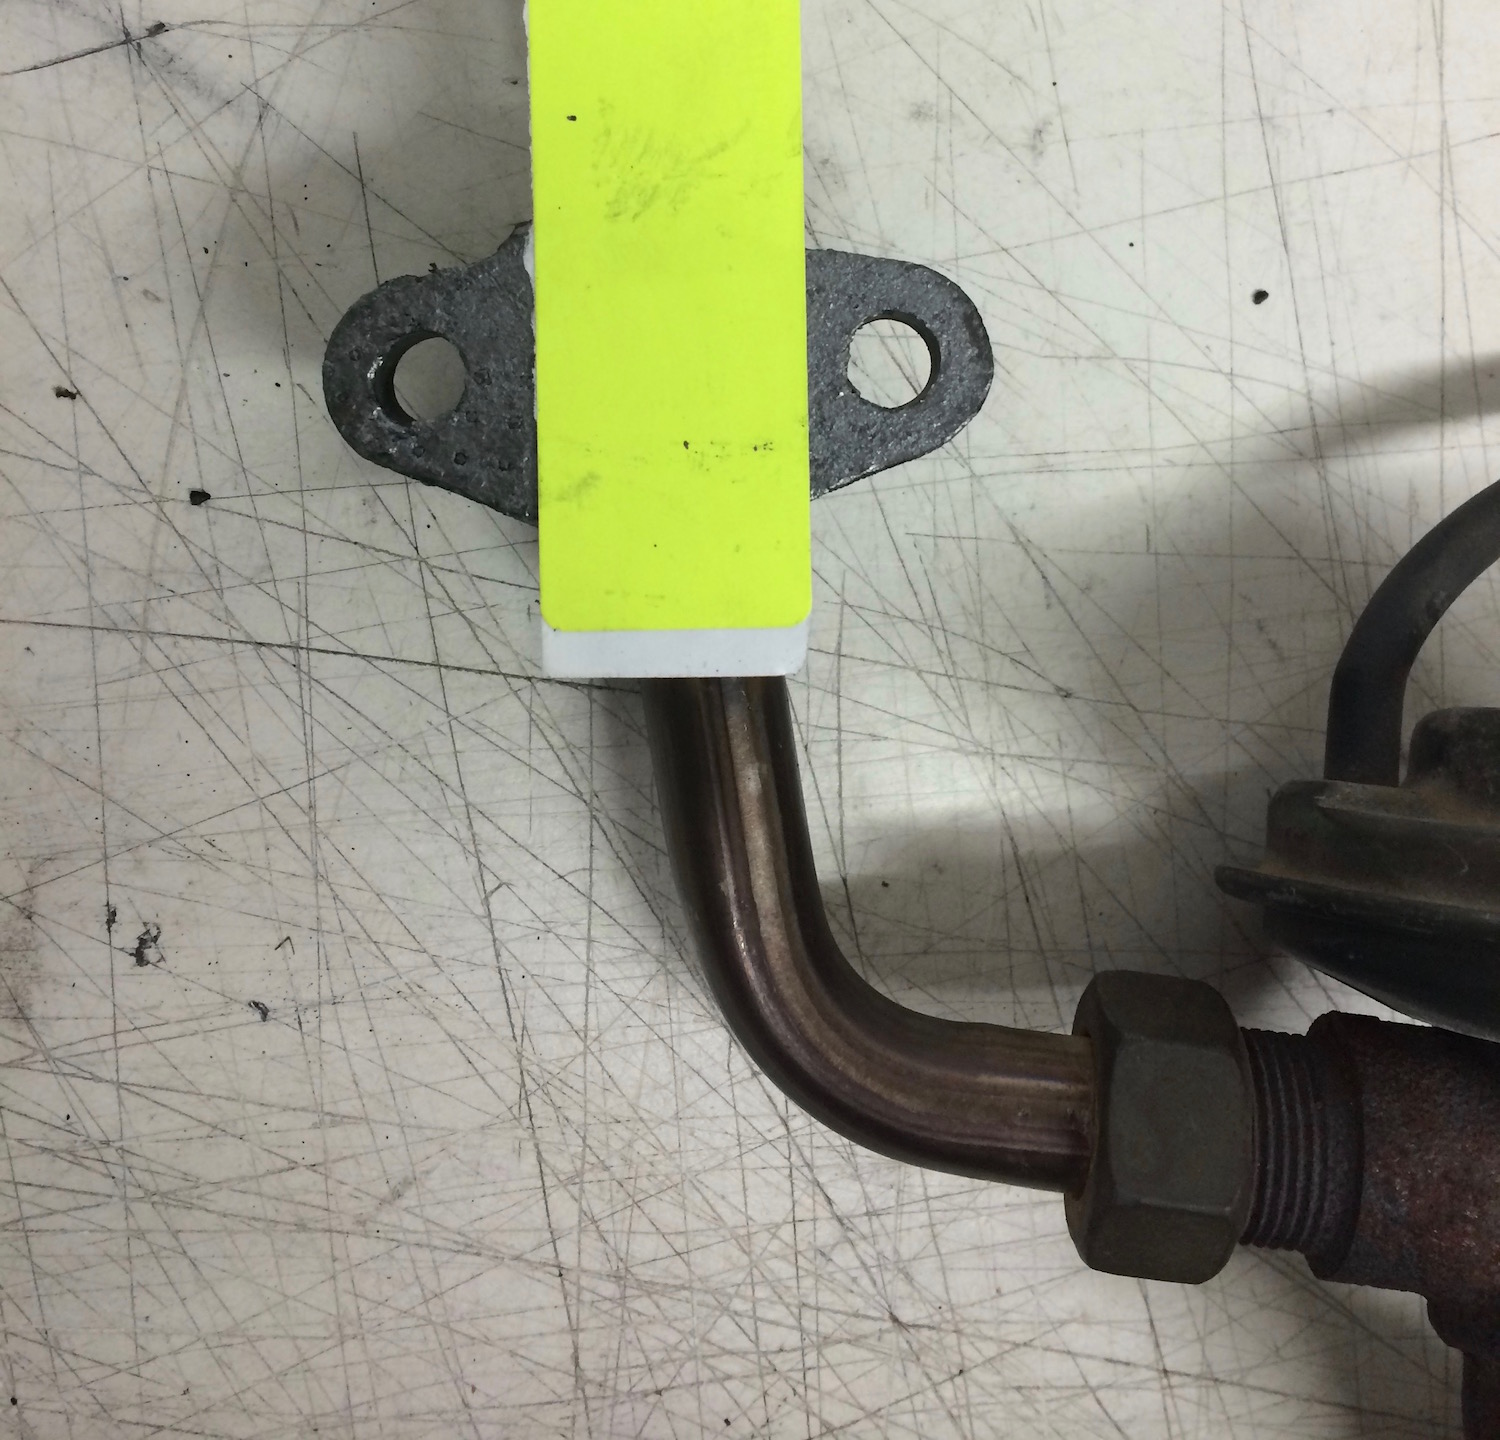
Loosen the 27mm nut at the egr pipe, the loosen the two at the egr pipe to plenum. No need to fully remove them, just back them out a few threads, just enough to allow some room between the pipe and gasket/plenum. Cut a piece of aluminum can as shown in the middle picture above. Slide it down into the gap to cover the EGR hole at the pipe (again, shown in the middle picture). Tighten up the two pipe to plenum bolts and the egr pipe nut.
Road test it. Gone? No more miss? Good. Either the EGR valve is leaking exhaust gasses in to the plenum (creating a vacuum leak/lean run condition) or the egr valve pintle is sticking open. You'll either need to clean or replace the EGR valve.


“My truck cranks for a long time before it starts when it's cold. I need a need a new COLD START INJECTOR!”
Ummmmmm, probably not.

how to check your thermo time switch
Do you have trouble starting your truck in the morning? Long cranking time before the engine starts? How about after it’s sat for a couple hours? Most people seem to think it’s their cold start injector. Kinda’. More than likely the cold start injector is not “turning on” (making you think it’s bad) due to the thermo-time switch being out of range.
It’s a pricey part, so I recommend you check it before I sell you something you may not need. Grab your ohm meter and let’s do this.
This test should be performed when the engine is COLD! As in, it’s sat overnight COLD.
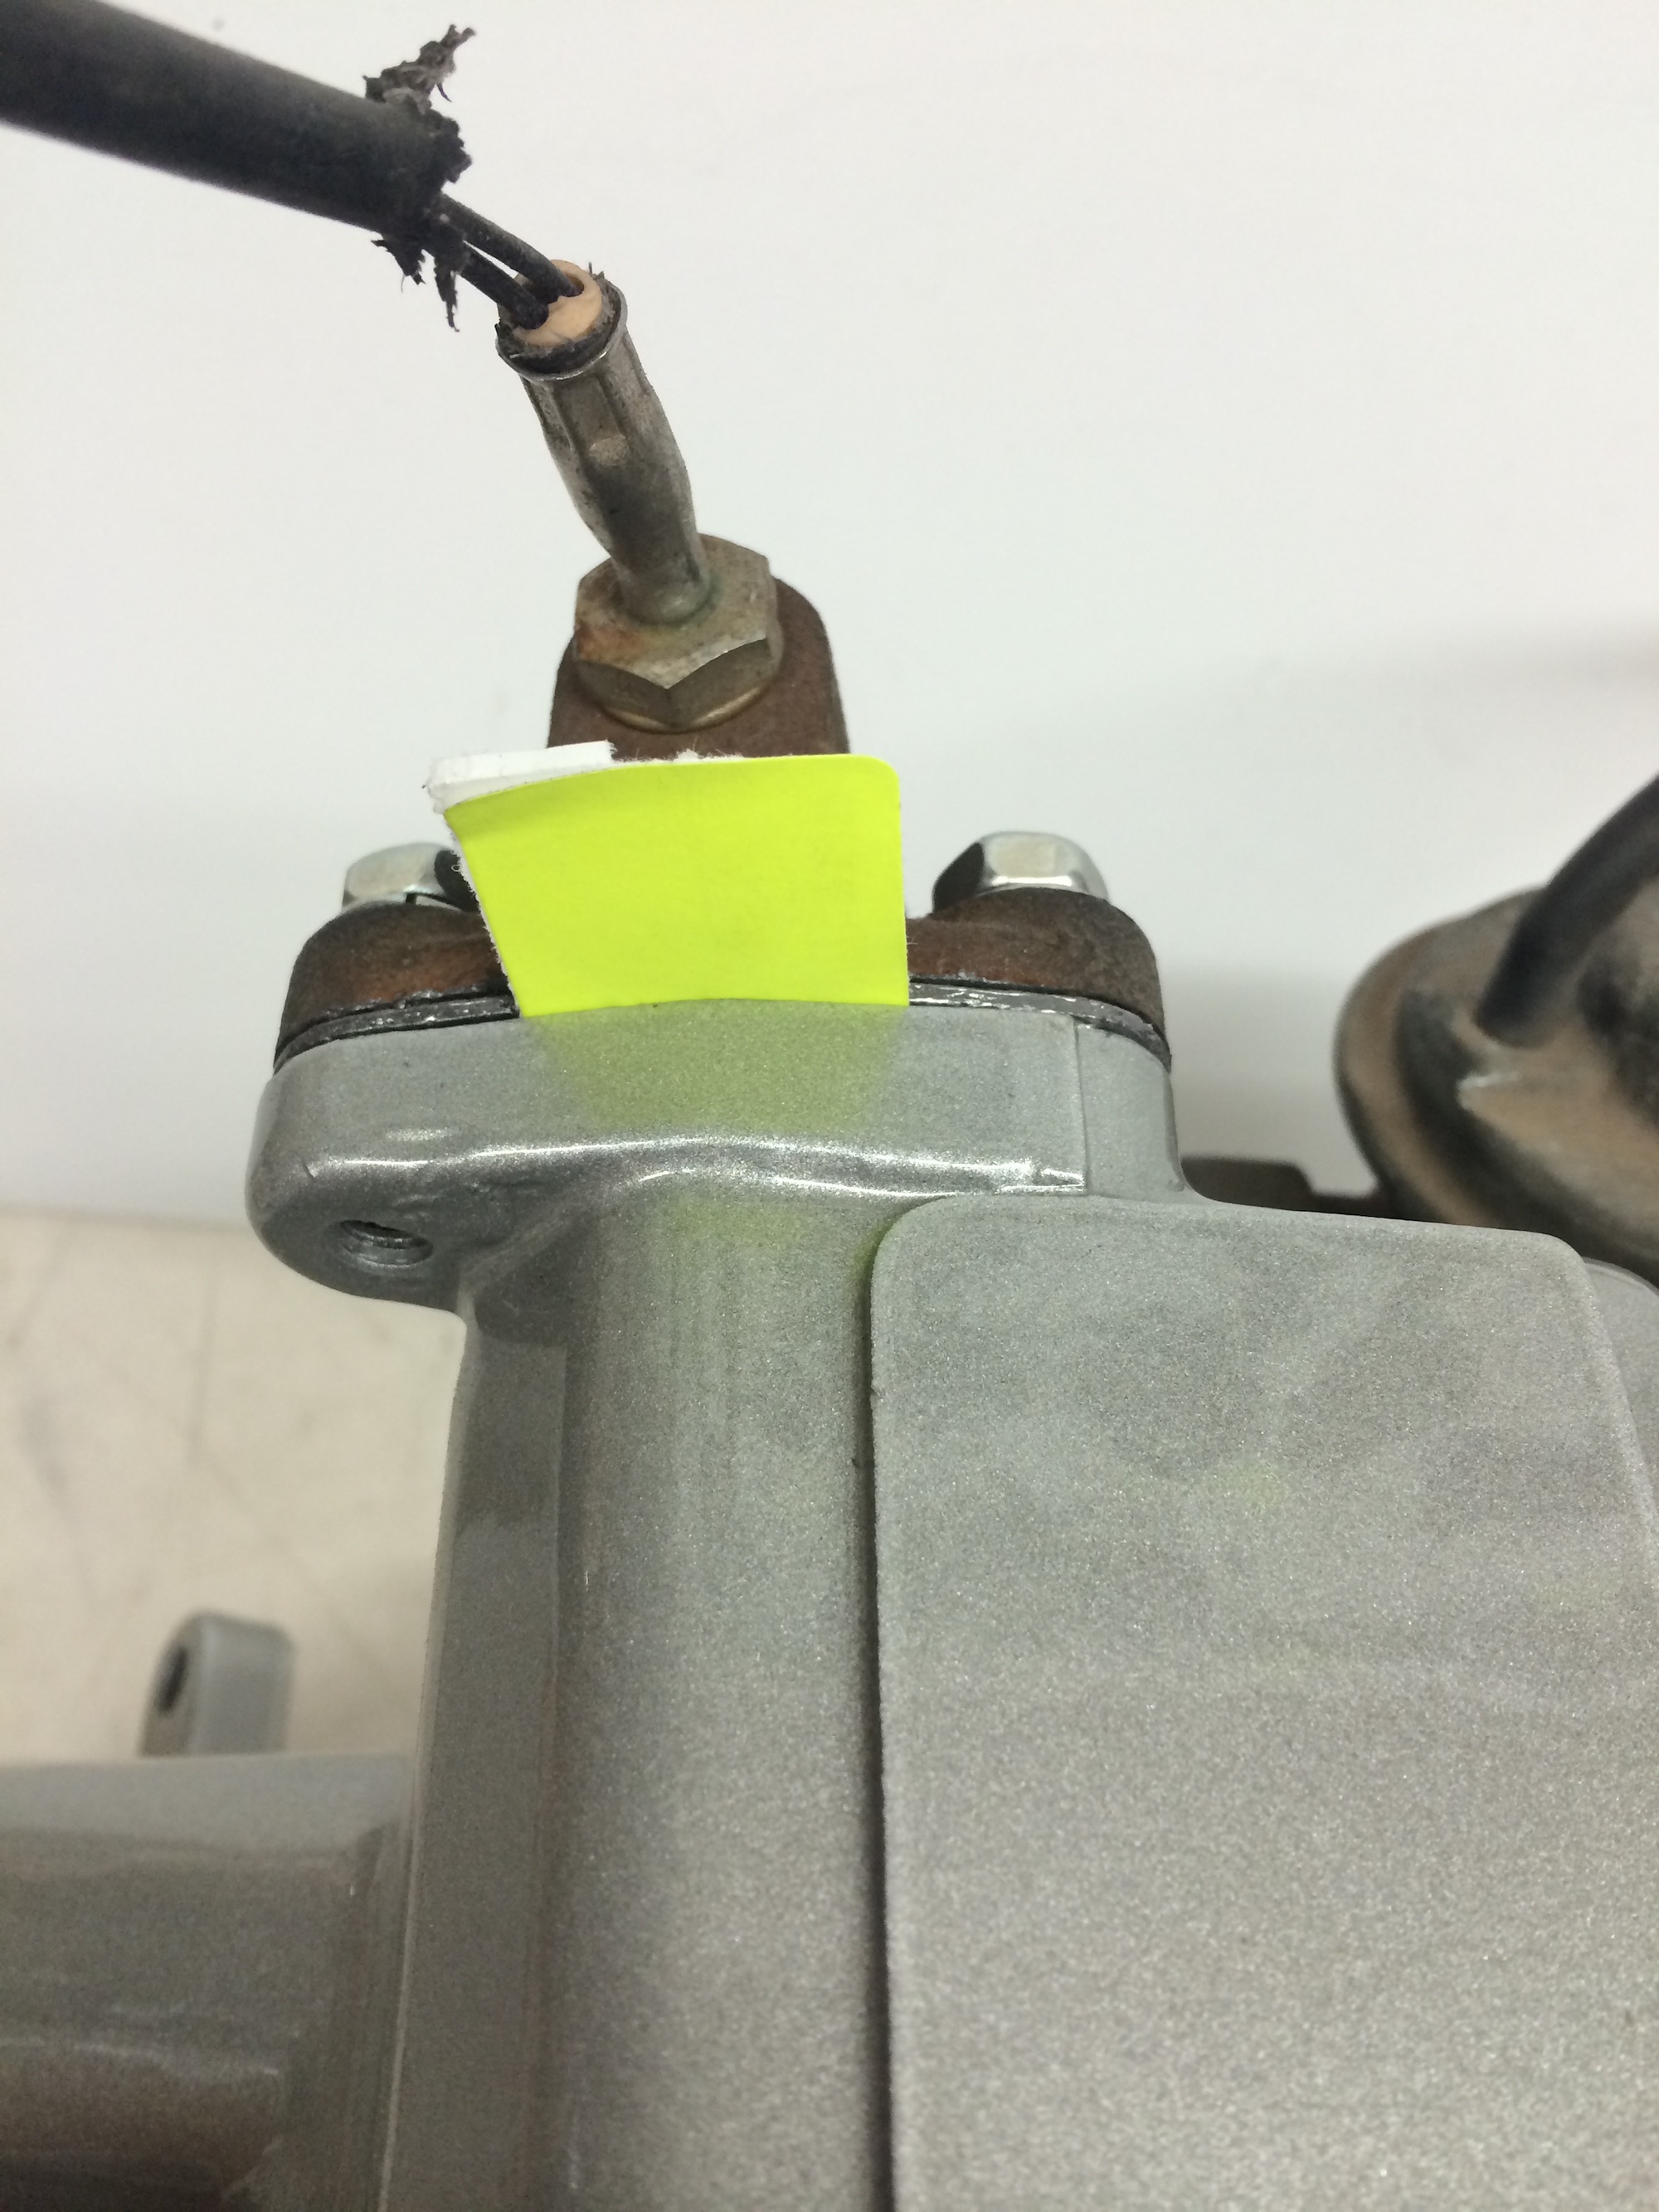
Connect the probes to the pins in the THERMO-TIME SWITCH.
1984-1988ish BROWN, SQUARE connector (shown at left) should read between 20 to 40 ohms when coolant temp is below 77 degrees. If you are getting anything higher than 40 ohms (when coolant is COLD), the thermo-switch is out of range and is not turning the cold start injector on. It
1988ish-1995 BLACK, ROUNDED connector should be 30-50 ohms when coolant temp is BELOW 50 degrees (yes, 50, very cold). If you are getting anything above 60 ohms when cold, the sensor is out of range.
When the sensor fails it usually fails in the “engine hot” range and it’s giving the ECU the wrong signal. When this tells the ECU the engine is already “hot” it doesn’t turn the cold start injector on, causing the long cranking time and rough idle when the engine is cold.
If you are getting the correct readings, but are still having the issue, check the condition of the wiring harness that connects to the switch. Because of the severe bend that it takes in combination with the high under-hood temps, these wires tend to get brittle and cracked. Take a close look at them and make sure everything is groovy there.


